
Hi AAT,
Thank you for testing the webcam example; it seems there might be a problem between Ubuntu and OpenCV.
- OpenCV defaulted to YUYV, but the webcams I've tested worked best with MJPG / JPEG
Test if the app Cheese (should already be installed) displays the same distortion as the image you posted.
Download the app GTK+ UVC Viewer.
- modify the setting Video Controls -- Camera Output until you get a clear image
This will not fix the OpenCV examples, but at least your system will have a working webcam.
The following commands can be used to view / set the available codecs (execute from Terminal):
sudo apt install v4l-utils
v4l2-ctl --list-formats-ext
v4l2-ctl --set-fmt-video=width=640,height=480,pixelformat=1
v4l2-ctl --device=/dev/video0 --set-fmt-video=width=640,height=480,pixelformat=1
v4l2-ctl --get-fmt-video
NB*: Once you run the OpenCV webcam example, the above settings will reset.
Additional Information:
- Compler--Compiler Options--Library Subsystem: gtk2
INSTALL INSTRUCTIONS:
1. Extract the OpenCV folder from the ZIP package
2. Open the /binaries/setup/ folder
3. Right-Mouse-Click selecting Open Terminal
4. Type sudo ./install_files.sh to install the required files
NB*: If you are concerned about changes to your Linux configuration, review install_files.sh before executing the above instructions.
PureBasic Interface to OpenCV
Re: PureBasic Interface to OpenCV
Last edited by JHPJHP on Wed Apr 19, 2017 3:12 pm, edited 3 times in total.

Re: PureBasic Interface to OpenCV
Hi, JHPJHP.
The Cheese program works fine with my webcam.
I configured the webcam native resolution 1280*720 and added an OpenCV windows for monitoring. The OpenCV images in them looks normal.
The images are here: http://rgho.st/7PQ4N9fm8
I think there is an error in conversion the OpenCV image to the PB image.
The Cheese program works fine with my webcam.
I configured the webcam native resolution 1280*720 and added an OpenCV windows for monitoring. The OpenCV images in them looks normal.
The images are here: http://rgho.st/7PQ4N9fm8
Code: Select all
ImportC "binaries/libopencv_highgui.so.2.4.13"
...
  cvShowImage(name.p-ascii, *image)
...
EndImport
...
If *capture
  cvSetCaptureProperty(*capture, #CV_CAP_PROP_FRAME_WIDTH, 1280)
  cvSetCaptureProperty(*capture, #CV_CAP_PROP_FRAME_HEIGHT, 720)
...
      If *image
...
        cvShowImage("TestImg", *image)
        cvShowImage("GrayImg", *gray)
        cvWaitKey(50)
      EndIf
...
Re: PureBasic Interface to OpenCV
Hi AAT,
It's good you are having some success with the webcam examples, but my experience is completely different; see my previous post for a full explanation.
I am going to continue playing around with the source script, in combination with various drivers and settings; eventually I will figure this out
It's good you are having some success with the webcam examples, but my experience is completely different; see my previous post for a full explanation.
I am going to continue playing around with the source script, in combination with various drivers and settings; eventually I will figure this out
Re: PureBasic Interface to OpenCV
Hi, JHPJHP.
My webcam's abilities are:
I changed IplImage to PBImage conversion procedure.
Now the example works fine for me.
The webcam mode is:
When i configured the webcam's resolution 1280*720
it works in MJPG mode:
My webcam's abilities are:
Code: Select all
ioctl: VIDIOC_ENUM_FMT
	Index       : 0
	Type        : Video Capture
	Pixel Format: 'MJPG' (compressed)
	Name        : Motion-JPEG
		Size: Discrete 1280x720
			Interval: Discrete 0.033s (30.000 fps)
		Size: Discrete 640x480
			Interval: Discrete 0.033s (30.000 fps)
		Size: Discrete 352x288
			Interval: Discrete 0.033s (30.000 fps)
		Size: Discrete 320x240
			Interval: Discrete 0.033s (30.000 fps)
		Size: Discrete 176x144
			Interval: Discrete 0.033s (30.000 fps)
		Size: Discrete 160x120
			Interval: Discrete 0.033s (30.000 fps)
		Size: Discrete 800x600
			Interval: Discrete 0.033s (30.000 fps)
		Size: Discrete 960x720
			Interval: Discrete 0.033s (30.000 fps)

	Index       : 1
	Type        : Video Capture
	Pixel Format: 'YUYV'
	Name        : YUYV 4:2:2
		Size: Discrete 1280x720
			Interval: Discrete 0.100s (10.000 fps)
		Size: Discrete 640x480
			Interval: Discrete 0.033s (30.000 fps)
		Size: Discrete 352x288
			Interval: Discrete 0.033s (30.000 fps)
		Size: Discrete 320x240
			Interval: Discrete 0.033s (30.000 fps)
		Size: Discrete 176x144
			Interval: Discrete 0.033s (30.000 fps)
		Size: Discrete 160x120
			Interval: Discrete 0.033s (30.000 fps)
		Size: Discrete 800x600
			Interval: Discrete 0.050s (20.000 fps)
		Size: Discrete 960x720
			Interval: Discrete 0.067s (15.000 fps)
Now the example works fine for me.
Code: Select all
#CV_CAP_ANY                                           = 0
#CV_CAP_PROP_FRAME_WIDTH                              = 3
#CV_CAP_PROP_FRAME_HEIGHT                             = 4
#IPL_DEPTH_8U                                         = 8
#CV_RGB2GRAY                                          = 7

Enumeration
  #MainWindow
  #WebcamImage
  #CatchedImgID
EndEnumeration

Structure CvCapture Align #PB_Structure_AlignC : EndStructure

Structure IplImage Align #PB_Structure_AlignC
  nSize.l
  ID.l
  nChannels.l
  alphaChannel.l
  depth.l
  colorModel.a[4]
  channelSeq.a[4]
  dataOrder.l
  origin.l
  align.l
  width.l
  height.l
  *roi.IplROI
  *maskROI.IplImage
  *imageId
  *tileInfo.IplTileInfo
  imageSize.l
  *imageData.BYTE
  widthStep.l
  BorderMode.l[4]
  BorderConst.l[4]
  *imageDataOrigin.BYTE
EndStructure

Structure Pointer
  b.a
EndStructure

Structure CvMat Align #PB_Structure_AlignC
  type.l
  Step.l
  *refcount.LONG
  hdr_refcount.l
  StructureUnion
    *ptr.BYTE
    *s.WORD
    *i.LONG
    *fl.FLOAT
    *db.DOUBLE
  EndStructureUnion
  rows.l
  cols.l
EndStructure

ImportC "binaries/libopencv_core.so.2.4.13"
  cvCreateImage(*size, depth, channels)
  cvFlip(*src, *dst, flip_mode)
  cvReleaseImage(*image)
  cvReleaseMat(*mat)
EndImport

ImportC "binaries/libopencv_highgui.so.2.4.13"
  cvCreateCameraCapture(index)
  cvEncodeImage(ext.p-ascii, *image, *params)
  cvGetCaptureProperty.d(*capture, property_id)
  cvQueryFrame(*capture)
  cvReleaseCapture(*capture)
  cvSetCaptureProperty(*capture, property_id, value.d)
  cvShowImage(name.p-ascii, *image)
  cvWaitKey(delay)
EndImport

ImportC "binaries/libopencv_imgproc.so.2.4.13"
  cvCvtColor(*src, *dst, code, dstCn)
EndImport

ImportC ""
  gtk_widget_get_toplevel(*widget.GtkWidget)
  gtk_window_set_icon_from_file(*window.GtkWindow, icon.p-utf8, error)
EndImport

Repeat
  nCreate + 1
  *capture.CvCapture = cvCreateCameraCapture(#CV_CAP_ANY)
Until nCreate = 5 Or *capture

If *capture
  FrameWidth = cvGetCaptureProperty(*capture, #CV_CAP_PROP_FRAME_WIDTH)
  FrameHeight = cvGetCaptureProperty(*capture, #CV_CAP_PROP_FRAME_HEIGHT)

  If FrameWidth > 640
    nRatio.d = 640 / FrameWidth
    FrameWidth * nRatio : FrameHeight * nRatio
    cvSetCaptureProperty(*capture, #CV_CAP_PROP_FRAME_WIDTH, FrameWidth)
    cvSetCaptureProperty(*capture, #CV_CAP_PROP_FRAME_HEIGHT, FrameHeight)
  EndIf

  cvSetCaptureProperty(*capture, #CV_CAP_PROP_FRAME_WIDTH, FrameWidth)
  cvSetCaptureProperty(*capture, #CV_CAP_PROP_FRAME_HEIGHT, FrameHeight)
  *image.IplImage : PokeL(@*size, FrameWidth) : PokeL(@*size + 4, FrameHeight)
  *gray.IplImage = cvCreateImage(*size, #IPL_DEPTH_8U, 1)
  pbImage = CreateImage(#PB_Any, FrameWidth, FrameHeight)

  *mat.CvMat

  If OpenWindow(#MainWindow, 0, 0, FrameWidth, FrameHeight, "PureBasic Interface to OpenCV", #PB_Window_SystemMenu | #PB_Window_MinimizeGadget | #PB_Window_ScreenCentered)
    *window = gtk_widget_get_toplevel(WindowID(#MainWindow))
    gtk_window_set_icon_from_file(*window, "binaries/icons/opencv.png", #Null)
    ImageGadget(#WebcamImage, 0, 0, FrameWidth, FrameHeight, #Null)
    GadgetToolTip(#WebcamImage, "Double-click to toggle between color and grayscale")

    Repeat
      *image = cvQueryFrame(*capture)

      If *image
        If nGray
          cvCvtColor(*image, *gray, #CV_RGB2GRAY, 1)
          *mat = cvEncodeImage(".bmp", *gray, 0)
        Else
          *mat = cvEncodeImage(".bmp", *image, 0)
        EndIf
        CatchImage(#CatchedImgID, *mat\ptr)
        SetGadgetState(#WebcamImage, ImageID(#CatchedImgID))
        FreeImage(#CatchedImgID)
        cvReleaseMat(@*mat)
        cvWaitKey(50)
      EndIf
      Event = WindowEvent()

      Select Event
        Case #PB_Event_Gadget
          Select EventGadget()
            Case #WebcamImage
              Select EventType()
                Case #PB_EventType_LeftDoubleClick
                  nGray ! #True
              EndSelect
          EndSelect
        Case #PB_Event_CloseWindow : Break
      EndSelect
    ForEver
  EndIf
  FreeImage(pbImage)
  cvReleaseImage(@*gray)
  cvReleaseCapture(@*capture)
Else
  MessageRequester("PureBasic Interface to OpenCV", "Unable to connect to a webcam - operation cancelled.")
EndIfCode: Select all
Format Video Capture:
	Width/Height      : 640/480
	Pixel Format      : 'YUYV'
	Field             : None
	Bytes per Line    : 1280
	Size Image        : 614400
	Colorspace        : sRGB
	Transfer Function : Default
	YCbCr Encoding    : Default
	Quantization      : Default
FlagsCode: Select all
  FrameWidth = 1280
  FrameHeight = 720
  cvSetCaptureProperty(*capture, #CV_CAP_PROP_FRAME_WIDTH, FrameWidth)
cvSetCaptureProperty(*capture, #CV_CAP_PROP_FRAME_HEIGHT, FrameHeight) Code: Select all
Format Video Capture:
	Width/Height      : 1280/720
	Pixel Format      : 'MJPG'
	Field             : None
	Bytes per Line    : 0
	Size Image        : 1843789
	Colorspace        : Default
	Transfer Function : Default
	YCbCr Encoding    : Default
	Quantization      : Default
Flags Re: PureBasic Interface to OpenCV
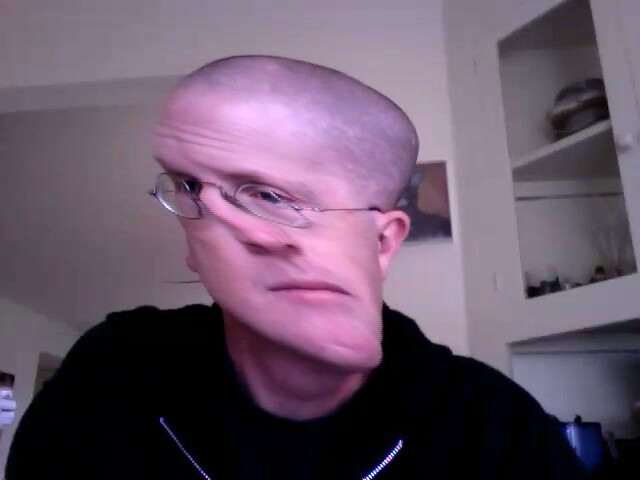
Hi AAT,
With the script you posted nothing has changed, my webcams only work in MJPG or JPEG mode. Using the correct mode for the following webcams only work until an OpenCV example is executed, and the Pixel Format is changed back to default.
Notwithstanding the demo example, I have tested numerous webcam examples from the main interface against 2 different webcams.
I am wondering if the problem could be with my Ubuntu installation; I will probably just reinstall Ubuntu.
Webcam1:
Webcam2:
With the script you posted nothing has changed, my webcams only work in MJPG or JPEG mode. Using the correct mode for the following webcams only work until an OpenCV example is executed, and the Pixel Format is changed back to default.
Notwithstanding the demo example, I have tested numerous webcam examples from the main interface against 2 different webcams.
I am wondering if the problem could be with my Ubuntu installation; I will probably just reinstall Ubuntu.
Webcam1:
Code: Select all
Format Video Capture:
	Width/Height      : 640/480
	Pixel Format      : 'YUYV'
	Field             : None
	Bytes per Line    : 1280
	Size Image        : 614400
	Colorspace        : sRGB
	Transfer Function : Default
	YCbCr Encoding    : Default
Quantization : DefaultCode: Select all
Format Video Capture:
	Width/Height      : 1280/1024
	Pixel Format      : 'BA81'
	Field             : None
	Bytes per Line    : 1280
	Size Image        : 1310720
	Colorspace        : sRGB
	Transfer Function : Default
	YCbCr Encoding    : Default
Quantization : DefaultRe: PureBasic Interface to OpenCV
Hi AAT,
The issue you reported was due to the pixel difference between Linux and OSX; RGB vs RGBA. I have updated the two Procedures, OpenCV2PBImage and OpenCV2PBImage_ASM, removing the alpha channel setting.
After numerous Ubuntu installations, I have only managed to confirm that the issue I am experiencing is between OpenCV and Ubuntu; see my previous posts for additional information.
In order to move forward with the webcam examples, I have opted to force an aspect ratio that worked on my computer, at least until I come up with a better solution, or one is presented.
--------------------------------------------------------------------------------
Updated the Main Linux Interface with an additional 26 examples:
- cv_cam_angle.pb: calculates the angle of a line between two tracked object, one red and one blue, relative to their horizontal position
- cv_cam_DCT.pb: performs a discrete cosine transform of a 1D array, displaying its power spectrum
- cv_cam_DFT.pb: performs a discrete Fourier transform of a 1D floating-point array, displaying its power spectrum
- cv_cam_effects.pb: pixel manipulation through direct memory access, demonstrating two webcam effects
- cv_cam_falling_balls.pb: falling balls game: Try to stop the balls from reaching the bottom of the screen
- cv_cam_goodfeatures.pb: determines strong corners on an image indicated by circles
- cv_cam_haardetect_face.pb: tries to detect a frontal-face using HaarCascades
- cv_cam_hsv_bgr.pb: display the HSV and BGR color space values determined by the X/Y mouse pointer location
- cv_cam_logo.pb: adds a logo with border to a webcam stream by utilizing the Region Of Interest functions
- cv_cam_matchtemplate.pb: object recognition using the template matching algorithm
- cv_cam_motionhistory.pb: gradients of motion history are used to detect direction of motion
- cv_cam_pixelate.pb: pixelizes a webcam stream by averaging NxN block regions, and applying the color values to grid squares
- cv_cam_select_1.pb: demonstrates the ability to select an area on the webcam interface
- cv_cam_select_2.pb: demonstrates the ability to select an area on the webcam interface
- cv_cam_setimageROI.pb: displays either a second webcam or simulates a second webcam by duplicating the main one
- cv_cam_shapes.pb: draws moving and static shapes using various filters
- cv_cam_spider_web.pb: draw a Spider Web sketch from a webcam frame
- cv_cam_stippling.pb: stippling is the creation of a pattern simulating varying degrees of shading by using small dots
- cv_cam_text.pb: draws moving text of various styles
- cv_cam_warpaffine.pb: warp, stretch, rotate and resize a webcam stream
- cv_cam_warpperspective.pb: calculates a perspective transform from four pairs of corresponding points
- le_cam_extractSURF.pb: detects keypoints and computes SURF (Speeded-Up Robust Features) descriptors on the webcam interface
- pb_cam_effects_1.pb: applies a fixed-level threshold to each array element
- pb_cam_effects_2.pb: calculates the per-element bit-wise conjunction
- pb_gl_cam_cube.pb: using OpenGL and textures, the webcam interface is displayed onto the surfaces of a rotating cube
- pb_gl_cam_invert.pb: using OpenGL and textures, the webcam interface is displayed onto the front and inverted onto the back of a revolving rectangle
Re: PureBasic Interface to OpenCV
Hi, JHPJHP.
I will test all the examples with webcam.
-------------------------------------------------------
Update
1. All examples works after deletion of the line
I think it's not a good idea to set the resolution of the webcam this way. For example, my webcam (cv_cam_angle.pb example):
FrameWidth=640, FrameHeight=480
FrameWidth=960, FrameHeight=720
At this point you have difference between heigts of hsv and image:
hsv height = 540, image height = 720
so after
an error occurs.
2. Programs do not respond to keys presses.
3. I can't move slider and no reaction on mouse left button
- cv_cam_pixelate.pb
- cv_cam_warpaffine.pb
- cv_cam_warpperspective.pb
I will test all the examples with webcam.
-------------------------------------------------------
Update
1. All examples works after deletion of the line
Code: Select all
FrameWidth = 960 : FrameHeight = 540Code: Select all
  FrameWidth = cvGetCaptureProperty(*capture, #CV_CAP_PROP_FRAME_WIDTH)
FrameHeight = cvGetCaptureProperty(*capture, #CV_CAP_PROP_FRAME_HEIGHT)Code: Select all
  nRatio.d = 960 / FrameWidth
FrameWidth * nRatio : FrameHeight * nRatioCode: Select all
  FrameWidth = 960 : FrameHeight = 540
...
  PokeL(@*size, FrameWidth) : PokeL(@*size + 4, FrameHeight)
*hsv.IplImage = cvCreateImage(*size, #IPL_DEPTH_8U, 3)hsv height = 540, image height = 720
so after
Code: Select all
cvCvtColor(*image, *hsv, #CV_BGR2HSV, 1)2. Programs do not respond to keys presses.
3. I can't move slider and no reaction on mouse left button
- cv_cam_pixelate.pb
- cv_cam_warpaffine.pb
- cv_cam_warpperspective.pb
Re: PureBasic Interface to OpenCV
Hi AAT,
Thank you for spending the time to test the webcam examples.
Thank you for spending the time to test the webcam examples.
Using a forced resolution was required to complete the interface; it has now been removed.AAT wrote:1. All examples works after deletion of the line
...
I think it's not a good idea to set the resolution of the webcam this way.
JHPJHP wrote:In order to move forward with the webcam examples, I have opted to force an aspect ratio that worked on my computer, at least until I come up with a better solution, or one is presented.
I am not seeing these problems?AAT wrote:2. Programs do not respond to keys presses.
3. I can't move slider and no reaction on mouse left button
- cv_cam_pixelate.pb
- cv_cam_warpaffine.pb
- cv_cam_warpperspective.pb
Last edited by JHPJHP on Sat Apr 15, 2017 5:08 am, edited 2 times in total.
Re: PureBasic Interface to OpenCV
Updated the libraries in both the Demo & Main Linux packages.
Updated the Main Linux Interface with 4 default examples:
- aaa_cv_cam_default.pb, aaa_cv_default_1.pb, aaa_cv_default_2.pb, aaa_pb_cam_default.pb
Updated the Main Linux Interface with the final 27 examples:
- cv_maxrect.pb: finds a bounding rectangle for two given rectangles
- cv_cam_camshift.pb: using the Camshift algorithm, color information is used to track an object along an image sequence
- cv_cam_chessboard_1.pb: after finding the positions of internal corners for a 10 x 7 chessboard pattern
- cv_cam_chessboard_2.pb: finds the positions of internal corners for a 10 x 7 chessboard pattern
- cv_cam_convexitydefects.pb: calculates the contour areas, finding the convex hull of point sets to convexity defects
- cv_cam_detect_hand.pb: contour extraction and calculation is used to determine finger, palm, and depth locations
- cv_cam_flowfarneback.pb: dense optical flow technique using the Gunnar Farneback algorithm
- cv_cam_flowpyrlk_1.pb: sparse optical flow technique using the Lucas-Kanade algorithm
- cv_cam_flowpyrlk_2.pb: sparse optical flow technique using the Lucas-Kanade algorithm
- cv_cam_foreground.pb: displays a threshold foreground view using filters to return the difference between frames
- cv_cam_glow_color.pb: adds a glow effect to red objects
- cv_cam_haar_transform.pb: builds a direct and inverse Haar wavelet transform
- cv_cam_histogram.pb: calculates a histogram for the Red, Green, and Blue channels of webcam frames
- cv_cam_saveimage.pb: images are saved to a folder at one second intervals
- cv_cam_skin_detection_1.pb: skin detection using various filters applied against the YCrCb (Luma [Y] and Chroma [CrCb]) color space
- cv_cam_skin_detection_2.pb: detect skin tones using the HSV (Hue, Saturation and Value) color space
- cv_cam_skin_detection_3.pb: detect skin tones using the YUV (Luma [Y] and Chroma [UV]) color space
- cv_cam_skin_detection_4.pb: detect skin tones using the YCrCb (Luma [Y] and Chroma [CrCb]) color space
- cv_cam_skin_detection_5.pb: detect skin tones using the RGB (Red, Green and Blue) color space
- cv_cam_skin_detection_6.pb: detect skin tones using the RG (Red and Green) color space
- cv_cam_split_merge.pb: divides a multi-channel array into several single-channel arrays
- cv_cam_track_color.pb: tracks red objects demonstrated by drawing a line that traces its location
- cv_cam_undistort.pb: calibrate webcam with a 10 x 7 chessboard pattern, displaying the raw and undistorted images
- cv_cam_writeframe_1.pb: video is saved to a folder
- cv_cam_writeframe_2.pb: images are saved to a folder
- cv_cam_zone_tracking.pb: calculates the weighted sum of the input image and the accumulator creating a silhouette effect
- cv_pb_cam_database.pb: captures and saves webcam frames to a database, displaying a thumbnail version of the image loaded from the database
Re: PureBasic Interface to OpenCV
Ubuntu has release version 17.04; the following update was required after upgrading from version 16.04 LTS.
Updated the Demo Linux and Main Linux Interfaces:
- replaced the 17 library files
- updated 2 files
-- Build OpenCV Libraries.pdf, install_files.sh
INSTALL INSTRUCTIONS:
1. Extract the OpenCV folder from the ZIP package
2. Open the /binaries/setup/ folder
3. Right-Mouse-Click selecting Open Terminal
4. Type sudo ./install_files.sh to install the required files
NB*: If you are concerned about changes to your Linux configuration, review install_files.sh before executing the above instructions.
Re: PureBasic Interface to OpenCV
Hi AAT,
Previously you mentioned that the cvWaitKey Function was not recognizing key presses in Ubuntu; I am now having the same problem.
This was fixed by setting the keyPressed variable to the Character data type.
- instead of updating every example, a Global variable was placed in the file includes/pb_procedures.pbi
------------------------------------------------------------------------------
Updated the Main and World packages:
- added 1 example
-- cv_remap.pb: map a rectangular image into a circle
Based on script found here.
------------------------------------------------------------------------------
Updated the Windows packages:
- modified 1 Procedure
-- OpenCV2PBImage: added parameter nDepth (24 / 32 :: default 24)
- added 2 Procedures
-- OpenCV2PBImage24_ASM
-- OpenCV2PBImage32_ASM
NB*: The 2 ASM Procedures were contributed by wilbert, who was also an invaluable support during the OSX and Linux builds.
Re: PureBasic Interface to OpenCV
Updated the Windows Main and World packages:
- added 1 example
-- cv_cam_kalman.pb: attempts to track the movements of an object by color (default blue) using the Kalman filter, estimating its position even under occlusions
To better understand how to use this example, see this video by the original author: Walter Lucetti aka Myzhar.
Based on script found here.
Added the example cv_cam_kalman.pb to the Linux and OSX Main packages.
Updated the webcam examples in the Windows Main and World packages to a maximum fixed ratio.
Applied a couple minor bug fixes to various examples in all packages.
- added 1 example
-- cv_cam_kalman.pb: attempts to track the movements of an object by color (default blue) using the Kalman filter, estimating its position even under occlusions
To better understand how to use this example, see this video by the original author: Walter Lucetti aka Myzhar.
Based on script found here.
--------------------------------------------------------------Walter Lucetti aka Myzhar wrote:The software is tuned such to identify a blue ball. You can modify the color simply changing the values of the HUE “MIN_H_BLUE” and “MAX_H_BLUE” at the very beginning of the code. Even if the code is really short, the theory behind it is really complicated and requires high level mathematical knowledge. The tracking uses what is known in literature as “Kalman Filter“, it is an “asymptotic state estimator”, a mathematical tool that allows to estimate the position of the tracked object using the cinematic model of the object and its “history”. Wikipedia has a good page about Kalman filter, the explaination is really well done, even if it is not really easy to understand it if you do not have enough mathematical capabilities. We can simply say that the Kalman filter works in two steps: PREDICTION and UPDATE. The PREDICTION step allows to predict the position of the object knowing its history, the speed of its movements and knowing the equations that identify its movements. The PREDICTION is corrected every time a measure of the state of the object is available, this correction makes the UPDATE step. Unfortunately, the measure is not perfect, each measure has errors, so PREDICTION and UPDATE are weighted using information about measure and prediction errors...
Added the example cv_cam_kalman.pb to the Linux and OSX Main packages.
Updated the webcam examples in the Windows Main and World packages to a maximum fixed ratio.
Applied a couple minor bug fixes to various examples in all packages.
Re: PureBasic Interface to OpenCV
Updated the Main packages:
- added 1 example
-- le_cam_nearest_neighbor.pb: detects keypoints and computes SURF (Speeded-Up Robust Features) descriptors, finding the two nearest neighbors
INSTRUCTIONS:
1. Show the cover of a book or DVD or ... to the webcam.
2. Use the mouse to select an area of the book (more detail the better).
3. Test detection: hold the book upside down, sideways, on an angle, etc.
This example uses the SURF algorithm to detect a pre-scanned object, but can be modified for object recognition with a few minor changes.
See the example le_nearest_neighbor.pb for script to save keypoints and descriptors to XML files.
- a database of keypoints and descriptors could be used in an object/face recognition system
NB*: Update also includes some minor bug fixes and enhancements to various examples.
Re: PureBasic Interface to OpenCV
Updated the Main and World packages:
- added 3 examples
-- cv_painted.pb: apply a painted effect to an image
-- cv_posterize_1.pb: apply a color posterize effect to an image
-- cv_posterize_2.pb: apply a black and white posterize effect to an image
Based on scripts found here.
Renamed examples:
- *_cam_*.pb to *_webcam_*.pb
- *_mov_*.pb to *_video_*.pb
NB*: Update also includes some minor bug fixes and enhancements to all packages.
Re: PureBasic Interface to OpenCV
Updated the Main and World packages:
- added 1 example
-- cv_webcam_slit_scan.pb: Slit-Scan Imaging: A technique used to create time lapse image effects
Once the scan completes the slit-scanned image is auto-saved.
- press the Enter key at any time to reset scan from start
Updated the example with additional options and various improvements.
- Loop Scanning: [ L ] Key, Set Orientation: [ O ] Key, Reverse Direction: [ R ] Key